This technique will allow you to edit pages safely in the background, complete multiple edits across hours or even days, and only put live when you are 100% satisfied with your changes.
When editing your Squarespace site, you cannot test and create pages on other development platforms like Craft CMS. Ideally, you would always create and test pages on your local development environment first, and once you are satisfied, only then transfer and deploy the changed files to the live site. As a Squarespace design team, this is a little disappointing but just something we have to live with.
Squarespace has many benefits, but testing on another environment and then deploying isn't one of them. It's just not possible. You are editing the live site, and there's no way to really get around that with Squarespace.
There is something we can do though
Fortunately, there is a technique we can use within Squarespace templates - Coffee Cafe that allows us to create and edit pages, whilst the viewers on your site don't see any half-made pages and testing / partial content.
The technique below is quite straightforward, but I don't see every Squarespace designer utilising it, and everyone should be doing this.
It involves duplicating the page you want to edit, working on that duplicate page, and only once satisfied making the duplicate page the new live page.
Let me take you through it step by step.
- Choose the page you want to edit
- Duplicate the page
- Edit the duplicated page
- Edit the original title and url-slug
- Change the url-slug of the duplicated page
- Optional - Organise previously used pages
1. Choose page
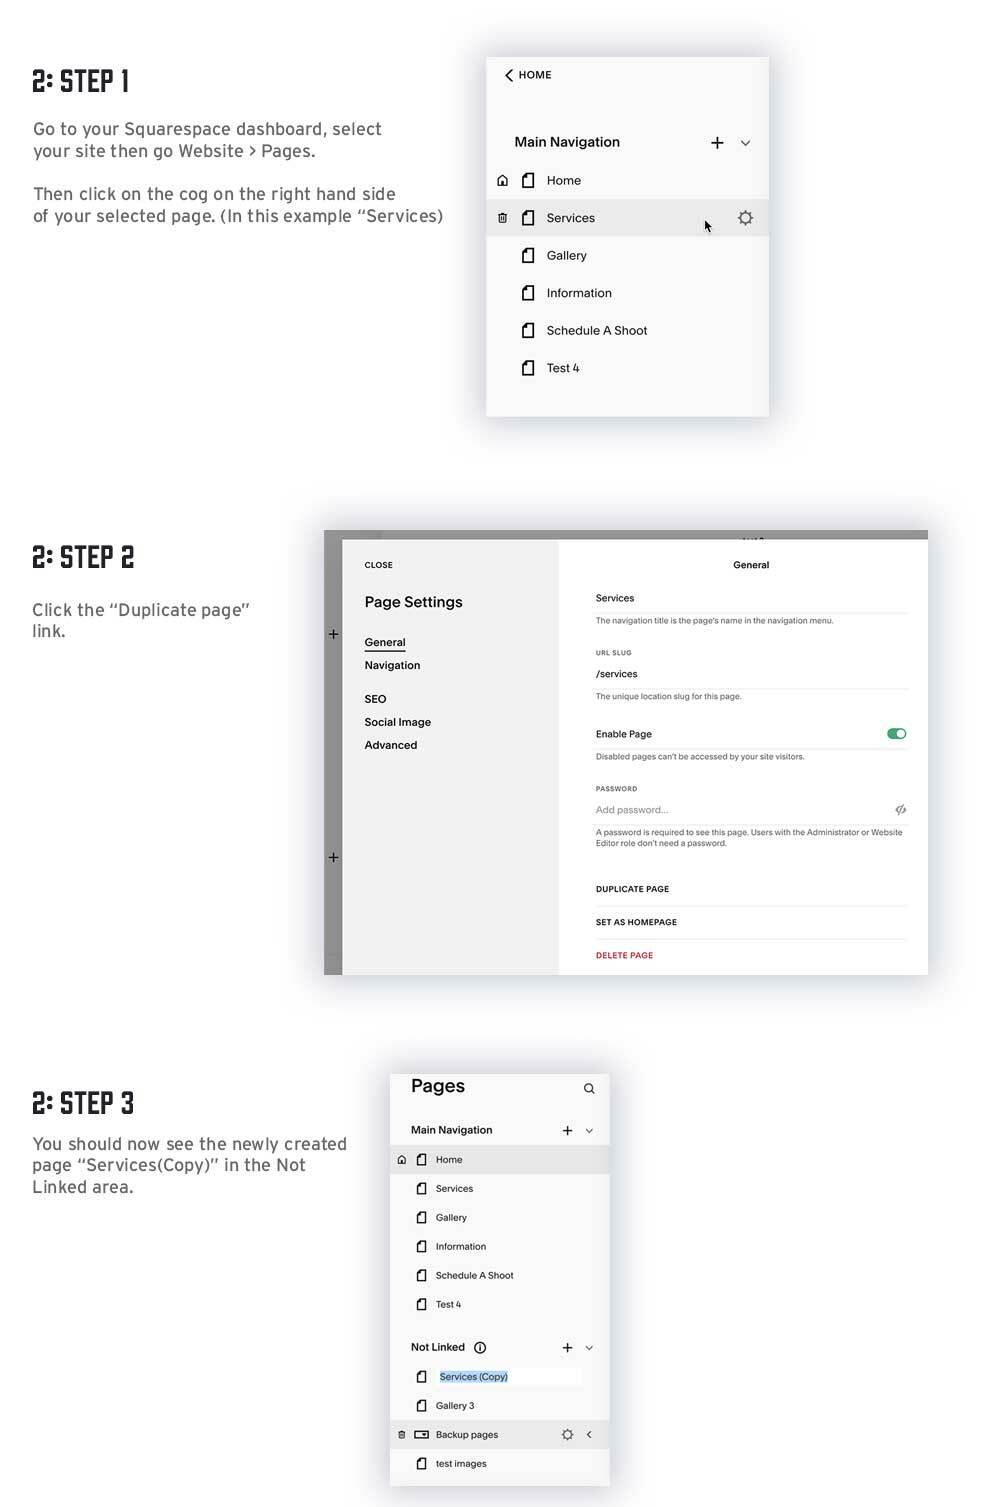
First, we want to decide which page to edit. In my example, I will use the "Services" page. Let's say I want to add a new design service to my services page.
2. Duplicate the page
We then want to duplicate that services page using that feature in Squarespace as seen below.

3. Edit the duplicated page
Edit this new page called "Services (copy)" like you would any other Squarespace page with copy, colours, images etc and save it.
4. Edit the original title and url-slug
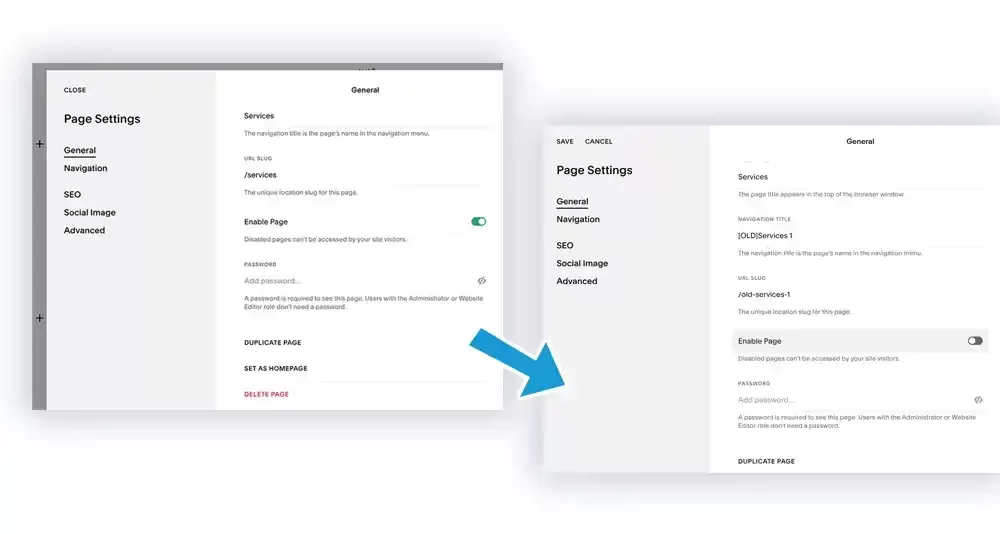
Now we want to rename the original "Services" page.

There are three things we changed in the above example screenshot.
- Navigation title to “[OLD]Services 1”
- URL slug to "old-services-1"
- Disabled the page
Note about renaming pages:
If you happen to have multiple pages duplicated in your own site, then further pages could be named something like:
[OLD]Services 2
[OLD]Services 3
and so on...
With the higher number being the most recently saved.
There is no particular magic to naming these pages, but keep it consistent and name them in a format that makes sense to you.
5. Change the url-slug of the duplicated page
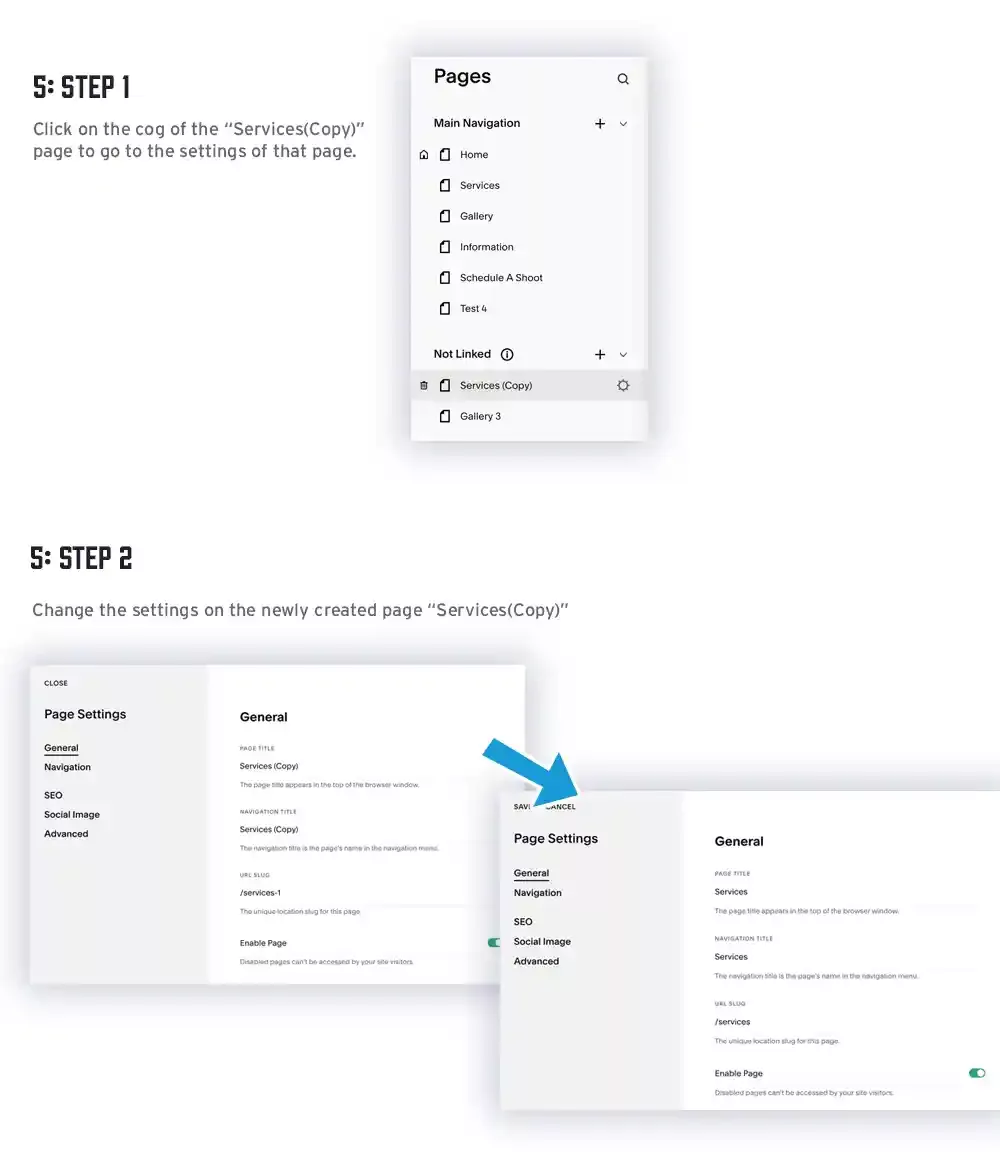
We now want to make our new page "Services (Copy)" the live page. So, we click on the cog and enter the settings for that page.

We now change four things
- Page title from "Services (Copy)" to "Services"
- Navigation title from "Services (Copy)" to "Services"
- Url Slug from "services-copy-1" to "services"
- Make sure the enabled option is green.
6. Optional - Organise previously used pages
This optional last step is to tidy up the navigation. I've made a dropdown menu here as a way to organise all the old pages. By naming it "Backup pages", you can store all your old pages in there, so you can revert if need be.
Some of you may want to just delete these older backup pages, but coming from a bit of web development experience, in my opinion, you can never keep enough backups.
That's us complete.
Final note
There are a number of steps above, but once you have used his technique a few times, it will make complete sense. In short, all we are really doing is duplicating a page, making edits, and then replacing the original page.
For those of you not using this technique, you have now learned a new superpower of editing Squarespace websites.
Any questions or feedback please Tweet me on X/Twitter.

